


For successful racing stripes installation, start by cleaning and drying your vehicle's surface, smoothing imperfections with automotive filler if needed. Protect the stripes with a coat or film for enhanced durability against UV damage, scratches, and stains. Meticulously clean and prepare the car's body for optimal adhesion, addressing wrinkles and uneven areas. Remove existing decals and inspect for dirt or scratches to ensure a smooth base for new racing stripes.
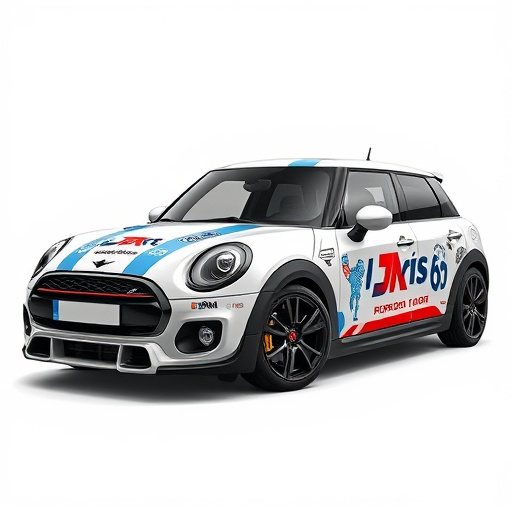
“Elevate your car’s style with a seamless, wrinkle-free racing stripe kit installation. This step-by-step guide ensures your vehicle boasts a professional, high-performance look. From preparing the surface for adherence to finishing touches, learn the secrets to a flawless application. Discover how to check for cleanliness and smoothness, remove impurities, and apply the stripes with precision. Additionally, gain tips on post-installation care, including heat treatment, cleaning, and storage for long-lasting results. Master the art of racing stripe installation today!”
- Preparing Your Surface for Racing Stripes
- – Checking the car body for cleanliness and smoothness
- – Removing existing stickers or debris that may interfere
Preparing Your Surface for Racing Stripes
Before applying racing stripes, ensuring your vehicle’s surface is clean, smooth, and free from any debris or imperfections is essential for a professional finish. Start by washing your car thoroughly using a dedicated car shampoo and microfiber cloths to remove dirt and grime. Dry the vehicle completely with another set of clean towels to prevent water spots that could affect adhesion.
Inspect the area where you’ll be installing the racing stripes, checking for any cracks, chips, or uneven surfaces. If necessary, use automotive-grade filler to smooth out imperfections and ensure a solid base. Once the surface is prepared, consider applying a protective coating or paint protection film over the stripes after installation. This extra step provides an added layer of defense against UV damage, scratches, and stains, ensuring your racing stripes remain vibrant and intact for longer periods, even under harsh conditions, with the help of vehicle wraps or protective coatings.
– Checking the car body for cleanliness and smoothness

Before beginning the racing stripes installation process, ensuring your car’s body is clean and free from any imperfections is paramount. Start by washing your vehicle thoroughly to remove dirt, dust, or any residue that might hinder adhesion. A smooth, contaminant-free surface is crucial for achieving a crisp, professional finish when applying racing stripes.
During this preparation stage, pay close attention to the car’s curves and contours. Ensure there are no wrinkles, creases, or uneven areas on the body panel where the stripes will be applied. Addressing these issues proactively will save time and effort later in the installation process, guaranteeing a seamless and attractive vehicle wrap, whether you’re opting for window tinting, heat rejection films, or comprehensive vehicle wraps as part of your racing stripe kit.
– Removing existing stickers or debris that may interfere

Before attempting to install racing stripes, it’s crucial to ensure your car’s surface is free from any existing stickers, debris, or residue that might interfere with the new application. Start by carefully removing old decals using a heat gun or a hairdryer set on low heat to soften the adhesive. This method allows for easier peeling without causing damage to the paintwork. Once removed, inspect the surface for any dirt, grime, or scratches that could affect the adhesion of the racing stripes.
A thorough paint correction or scratch protection treatment might be necessary if there are visible imperfections. These steps are essential to ensure a smooth base for your new stripes, enhancing their longevity and visual appeal. By addressing these considerations upfront, you lay the groundwork for a fast and flawless installation process.
Installing racing stripes without wrinkles requires a smooth, clean surface. By carefully preparing your car body, removing any obstructions, and following proper application techniques, you can achieve professional-looking racing stripe installations that enhance your vehicle’s appeal. Remember, a wrinkle-free finish is key to a successful racing stripes job—so take your time and ensure a flawless application.